Showing posts with label seeds. Show all posts

Tuesday, February 5, 2013

The Pine Cone Experiment


One of the other things the girls have been collecting during our recent explorations are pine cones.  In our community, there are some beautiful and prolific pine trees that line the main thoroughfare.  Have you ever noticed how pine cones change after a few days of rain?  This is an easy experiment to do with very common (and free!) materials.

Materials Needed:
  • pine cones, at least 8 - 10
  • small kitchen towel
  • container with water (we used a plastic storage container)
  • magnifying glass (optional)

Sunday, April 22, 2012

Recycled Mini Greenhouses

Happy Earth Day! We love Earth Day at our house; not just because of the concept behind it but also because it is the anniversary of our engagement!  11 years.  Which means that this year marks our 10th wedding anniversary - wow!  

Anyway, back to Earth Day... To celebrate this year, Maya and I raided our recycling bin and made some mini greenhouses in which to start our seeds.  Okay, to be honest, the toilet paper tubes hadn't even made it to the recycling bin.  I have an issue with disposing (even recycling) toilet paper tubes.  I keep thinking, "There has to be something I can do with this."  So, rather than throw them in with my other recyclables, I end up lining them up on the window sill behind the toilet waiting for inspiration to strike.  My friends that use my bathrooms must think I'm very odd.  Check that.  They already know that I'm odd, it's the visitors that happen to use the bathroom that must think I'm very odd.  Oh well.  

Sunday, April 15, 2012

Dissecting Bean Seeds

Spring has definitely arrived here and I am itching to get outside in the garden.  We have big, maybe too big given our newborn, plans for the garden this year including a square foot gardening project for the older girls.  (That particular project involves power tools - hooray!)  We just received some seeds we ordered in the mail this week from Seeds of Change (a great source for organic seeds - we got some San Marzano tomato seeds this year because I hear they make an amazing sauce!) and I made the comment about every seed having a baby plant inside.  The girls, as you can imagine with a new baby in the house, are fascinated by babies right now and wanted to see the baby plant so we decided to dissect some beans!
Materials Needed:
  • variety of dried beans - we used a bag of mixed dried beans intended for soup
  • water
  • paper towels
  • 5 plastic containers
  • magnifying glass
  • markers - I recommend permanent (for adult use!)
  • science journal

Friday, February 10, 2012

Winter Nature Hike


In November, I read an interesting interview on Outside Mom about trying to get your kids outside everyday, even it is just for 15 minutes.  I wouldn't classify it as a new year's resolution exactly, because that would doom it to failure, but it has remained in my mind ever since.  As the weather has remained positively balmy, for February anyway, and we've been a bit home-bound with some winter bugs going around, we decided to take a winter nature hike.  Winter is actually a great time to do a nature hike because the lack of foliage allows for better observation for some things that are normally hidden.  Plus, animal tracks are often more apparent in both the mud and the snow that are typical of winter.

Materials Needed:
  • weather appropriate clothing
  • method of recording findings - science journal or digital camera
  • guidebooks (optional)

Process and What's Happening?
This is a very free-form activity.  Encourage your child to use their five senses as you take your hike.  Obviously, I'm not encouraging using taste during this particular activity (yellow snow...eew!) but they can definitely use the other senses.  The sense of sight is so dominant for some people, it is often helpful to have your child close their eyes when you are working on another sense, like smelling or hearing.  Think about what people do when they are trying to find something buried in the bottom of their bag or purse - almost always, without realizing, they close their eyes as they rely on their sense of touch to find the missing object.  We were able to hear many more different types of birds with our eyes closed than we could actually see; even a black-capped chickadee, which is indicative of what a warm winter it has been because they don't normally migrate back up to Michigan until March.  I highly recommend the Audubon Birds app, available in the iTunes store, although it is a bit expensive at $20 although if you watch the site they periodically have an offer when you can get all of the Audubon apps for only $20 total, which is a really good deal.  The National Audubon society also has a free online guide to birds - with most of the same information as the app - but less mobile. 

Do find a way to document the experience.  Older children could draw pictures and write descriptions in a nature journal.  As this might be hard for younger kids, use a digital camera to document your walk.  If possible, let your child take control of the camera to take pictures of what you find on your hike. Once you are done, you could print a collage photo, like the one at the top of this post - I used Picasa for it, but a lot of the photo labs (Target, Walmart, grocery stores) etc. will let you do it fairly inexpensively.  You could also print all of their photos out and put them into a small album for them to review later.

Some things that you might be able to observe on your winter nature hike are discussed below.

Animal Shelter
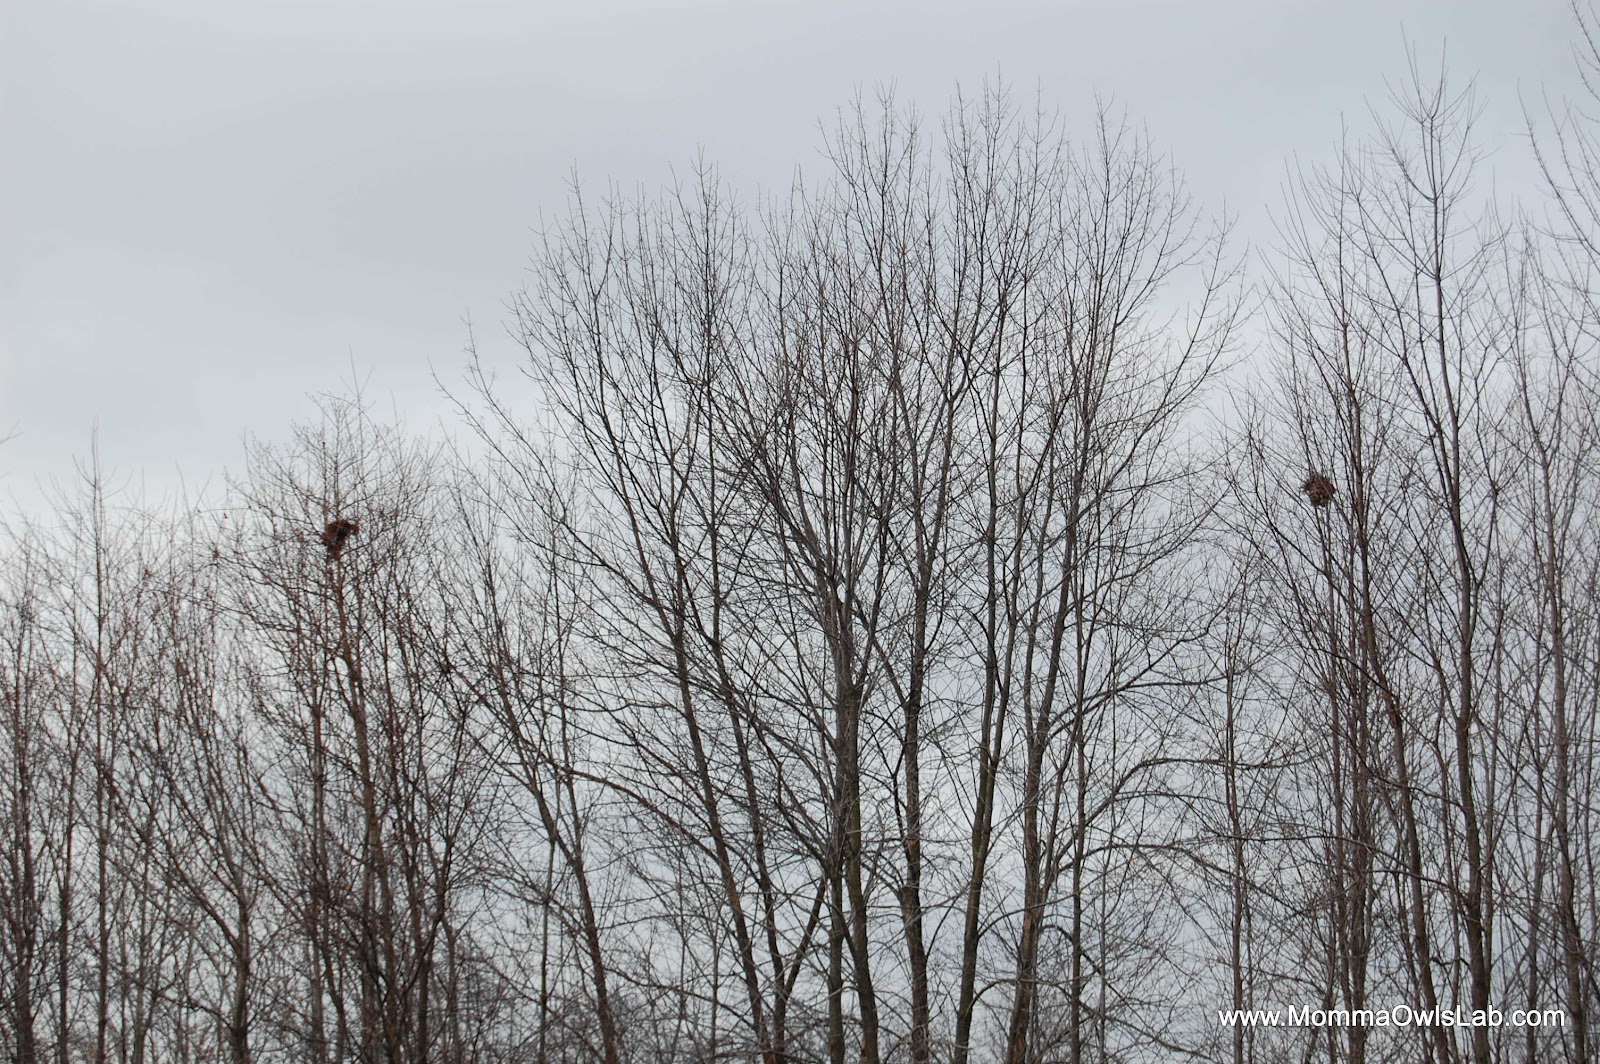
With the decreased foliage, birds nests are much easier to see so be sure to direct your eyes upward.  We were able to find three nests at the tops of three trees that were very close to each other (only two were captured in the picture below).  As they are fairly large nests, I believe at least one of them belongs to our local red-tailed hawk pair.  (We are super lucky to have a pair that lives so close to us - their courtship flights in the spring, with the male swooping and diving - are truly something to be seen!)

You also might be able to find brush piles that normally would be hidden in the summer.  You can talk to your child about how the small entry points into the brush pile make it easy for small animals to get in and out but prevent the larger animals that often prey on them from entering.  If you look carefully, you might be able to find other signs of small animals (squirrels, chipmunks, etc.) like tracks or acorns.


Animal Tracks
Winter is a great time to look for animal tracks, both in the snow and the mud.  This is a great opportunity to practice making inferences, or educated guesses, about what might have made the tracks.  To help, Bear Tracker is a great resource for identifying tracks, including a free two-page track of common tracks in North America.  We found deer, dog and rabbit tracks.  If we'd had some Plaster of Paris, it might have been fun to try to cast them as well.  If you don't have Plaster of Paris, you can always mix your own using white glue or flour - although I'm not sure how it would set up in the cold temperatures.  Something to try another time...


Food Sources
Look for seed heads and berries that may be a food source for the local birds and other animals.  We found some winter berry plants and the girls picked some flowers for me - seed heads of Queen Anne's Lace, which I think we'll tie together and put on our nature table as it tends to be a little sparse in the winter time.

Adaptations
A nature hike in winter is also a great time to talk about adaptations that help plants and animals survive the colder temperatures.  You can ask your child to compare the animals they might see in the summer with the ones they see in the winter.  Where do the animals go?  You can use this as an opportunity to talk about both migration and hibernation.

In terms of plants, you can talk about the differences between deciduous and coniferous trees and shrubs.  In general, deciduous trees and shrubs become dormant and drop their leaves in order to protect themselves against the lack of water that they face in the winter (snow pack doesn't count).  Coniferous trees and shrubs, sometimes called evergreens, are able to keep their leaves (waxy needles) because the specialized needles are able to control for loss of water.  (Note: there are some coniferous trees that do drop their needles, like larches.)  During your hike, you can practice classification by pointing out the different trees you come across and have your child identify whether it is a deciduous or coniferous tree or shrub. 


Extensions:

There are lots of books about winter for young children.  A few that we like, include When Winter Comes, by Nancy Van Laan, Animals in Winter by Henrietta Bancroft and Big Tracks, Little Tracks by Millicent Selsam.  If you have used a digital camera to document your hike, it might be really fun to write your own book and then print it on one of the photo lab sites like Shutterfly or Kodak Gallery.  

If you want to explore animal tracks further, think about using small plastic animals to make tracks in play-doh.  Two Chicks and a Hen has some great pictures of their footprints activity using the playdough recipe from Ten Kids and a Dog.  (I just love both of those blog names!!)  I also really like this Animal Track Booklet activity from My Montessori Journey that uses free animal track cards from Montessori for Everyone.

Finally, this might be a great opportunity to start a nature table or bowl if you don't already have one with pinecones or seed heads or pictures that you took from your winter nature hike.  A nature table is a small space, usually at kid height although depending on the ages of your little ones you may have to rethink that, on which to display some of their findings from their explorations in nature.  If you have limited space, a bowl may be used instead.  Sometimes people create miniature scenes using fairies or gnomes and other times its more of a collection.  I'll try to write more about our nature table and post some pictures in an upcoming post.

Science Process Skills Used In This Activity:

Observing Communicating Classifying Measuring Inferring Predicting
X
X
X

X


I hope you enjoy this activity!  If you try it, please let me a comment to let me know how it goes!
Pin It

Friday, October 28, 2011

Seed Dispersal

How do seeds move from one place to another?  This is a follow-up to our seed collection activity from a few weeks ago. If you haven't done a seed collection, this could be done with seeds available commonly in your refrigerator or pantry.  Also, as a note, this is a slightly more complicated activity and I imagine that it would work best with children that are slightly older - my five year old seemed to get it but I think it was a little tough for my little one.  I had a great friend, Amy, and her son, Lucas, join us for this activity and, as she is the plant goddess I mentioned in an earlier post, she was incredibly helpful in brainstorming ideas for this activity.  (She also has some great suggestions for books about seeds and exploring nature with children that I'll post at the very end.)  What follows is an edited version of what we did including some improvements brainstormed by my mother-in-law, a retired elementary teacher, who is spending time with us this week.

Materials Needed:
  • container with potting soil
  • flower head or seed pod with a multitude of seeds on it - we used a dried sunflower head, but you could use many different types of flowers.  If you don't have access to something like that, you could also use an apple, an orange or a handful of dried beans.
  • 4 to 6 seed samples - try for a diversity of seeds that may use a variety of seed dispersal methods.  Some of the ones we used were: maple seeds, pine cones, butterfly weed seed pods, acorns, blue false indigo seed pod, ornamental pear, crab apple, burdock, and dandelion seed heads.
  • stickers to represent the three different dispersal methods that we are going to talk about (wind, animal/human, and water).  I found relevant clip art images that I printed on some labels, but you could use three different color dot or face stickers.  Alternatively, you could write the word, i.e. "wind", on the plastic sample bag.  (But, stickers are fun!!)
  • piece of fabric - fuzzy fleece or anything with a faux animal texture would work really well
  • pan with water
  • sink with sprayer or small watering can (optional)
If you are working with more than one child, I recommend that you have sample bags containing each of the seeds available for each child to make thing move along more efficiently.

Process and Pictures:
Part 1: Why Do Seeds Disperse?
Lucas extracting the sunflower seeds.
Take the dried seed head and ask your child to see if they can find the seeds in it (you may need to help them).  Demonstrate to them how to remove the seeds and then see if they can extract some seeds as well.  Aim for about 10 seeds. If you are using a science journal, you can give your child a few minutes to draw the seed into their journal.  (They could also trace the seed!)  If you don't have a seed head or pod from outside, you could also cut an apple or orange in half and harvest the seeds from it.

The kids focusing on drawing their seed into their notebooks.
Then, take your container of soil and tell them that you want to plant the seeds so that you can have some more sunflowers (or beans, etc.).  Ask them to watch you carefully as you "plant" the seeds in the soil.  Make one small hole in the soil with your fingertip and then put every single seed, one by one, into that same hole.  Put on your acting personae and totally ham it up here; pretend to look into the hole to see if there is any more room, look worried, etc.  Ask your child if they think the seeds will grow well or not and make sure they justify their answer.   

Discuss with your child what plants need in order to grow - make sure they think about water, sunlight, space, nutrients and temperature.   (Note: the requirements for seed germination are different from plant growth - yup, I'm sure we'll be experimenting with that sometime in the near future.)  Ask your child how you could plant the seeds differently so they might have a better chance of surviving?  Talk about the fact that if all the seeds from a plant were to drop straight down in the same spot, then many baby plants wouldn't be able to survive.  So, instead, many seeds are able to move to other places so they have a better chance of survival.  But, how do seeds move?  Here you can ask some silly questions, like, "Do seeds have a car?"  For the next part of the activity, we will be talking about three different types of dispersal methods: wind, animal/human and water.
 
Part 2: How Do Seeds Disperse?
For each of the 4 to 6 seed samples collected, you are going to test whether you think they will be dispersed by wind, animal/human and/or water.

"1, 2, 3... Blow!"
Wind
To test for wind dispersal, have your child place the seed onto your hand.  Then have them blow onto the seed to mimic the wind and see if the seed will float through the air.  If it does, have them place one of the "wind" stickers onto the specimen bag holding the other seeds, or write the word "wind" on the bag.  They may want to hold the seed themselves to try to blow on it, which is great but try to encourage them to keep their hand steady so that it doesn't roll off.  Observe how the seed moves through the air - if you have a variety of seeds then you should be able to see a few different types of movement through the air from the floating of dandelion seeds to the helicopter motion of maple seeds.  Repeat the process for the rest of the seeds samples you have collected. 

Animals/Humans
Amy and Lucas examining a crab apple.
There are a couple of things you can do to explore the connection between animals (including humans) and seed dispersal.  The first is to take the piece of fabric and lay it on the table.  Ask your child to take the seed and gently throw it onto the fabric.  Pick up the fabric from one side and observe whether the seed "sticks" to the fabric or rolls off.  If it sticks to the fabric, like a burdock seed might, then animals might be responsible for its dispersal.  

The second thing you can do is examine the seeds and have a conversation with your child in regards to whether they've ever seen an animal eating that type of seed.  Squirrels and acorns are a commonly associated pair, but you could also talk about horses and apples or birds and berries.  Some children may also like talking about the idea of animals helping to provide the seed with a built-in fertilizer after the seed goes through the animal's digestive system! 

Put "animal/human" stickers onto the specimen bags that contain seeds that might be dispersed in this manner.  Note that at this point, some seeds may have tested positive for both wind and animal/human dispersal and will have two stickers; that is totally fine! 

Water
Testing for water dispersal: sink or swim and rain simulation.
Water is maybe the trickiest to test of these three seed dispersal methods.  One thing you can do is to test to see if the seed floats in water.  Note that this isn't necessarily the most accurate method as some seeds, like acorns, only float when they are no longer viable.  (So, if you want to grow an oak tree, dump a handful of acorns in water and only use the ones that sink!)  But, as we're really working on the process of science here, the floating technique is a decent test.

Another idea that Amy had is to place the seed on a pan or plate in the sink and then turn on the water and use the sprayer to see if they can spray the seed across the pan or plate.  Make sure that the water flow is at a fairly low pressure so that the force is reasonably similar to rain.  At higher pressures, you can talk about how maybe  that represents a seed falling into a river while at lower pressures it is more like rain run-off.  If you don't have a sprayer as part of your sink, you could also use a small watering can. 

Again, repeat for each of the seed samples and then mark each bag.

Help your child summarize their experience at the end by asking them to indicate which seed sample(s) represent each of the three types of seed dispersal mechanisms that we talked about.  Also ask if any of the types of seeds seem like they have more than one way that they can move.  (This is one of the reasons that the stickers work well; it makes it easy for the child to quickly identify the results of their tests.)

What's Happening?
Many plants utilize seed dispersal methods so that their seeds, their "offspring" have a better chance of survival.  In general, seeds need both appropriate temperature and moisture in order to germinate.  Seedlings, or young plants, need those two things as well as sunlight, nutrients and appropriate space.  We explored wind, animals/humans and water as three common dispersal methods.  In addition, both gravity and force are often cited methods but we skipped over them to simplify the activity.  The thought of explaining the concept of gravity to my preschoolers was a little daunting to me - not to mention the fact that everything is subject to gravity (thank you, Mr. Newton) so we wouldn't really be distinguishing our samples.  As an example of force dispersal, think of touch-me-not or jewel weed flowers whose ripe seed pod bursts open to spread their seeds.

If you tested all three dispersal methods, you probably found that some of you seed samples tested positively for more than one method.  This roughly approximates nature as some seeds may have a dominant method of dispersal whereas others may disperse by multiple means.  An example is the apple, which is a very commonly dispersed as animals eat it and then take the seeds to new locations.  However, an apple is also able to float (think: bobbing for apples) and is also capable of being moved by water.

Extensions:
For older kids: As I mentioned earlier, this activity is probably more suited to older kids (early elementary) that the really young ones.  For slightly older kids, you can increase the number of samples, have them make a data table that shows their results and incorporate measurement into some of the tests (i.e., measure how far they can blow different seeds).


Books: We found a couple of books at the library that were great supplemental material for this activity.  The first is Eric Carle's "The Tiny Seed", about a tiny seed that is blown from a flower in autumn and all the challenges that it must face to grow into a seed-producing flower.  We also enjoyed "Flip, Float, Fly: Seeds on the Move" by JoAnn Early Macken, which gave lots of examples of movements by different seeds. Amy recommends, "A Seed is Sleepy" by Diann Hutts Aston and Sylvia Long, which contains absolutely beautiful illustrations!


Exploring Nature with Kids: Amy also recommends a couple of other books that are great for teaching kids about nature.  They include: "Sharing Nature with Children" by Joseph Cornell, "Sunflower Houses: Inspiration from the Garden" by Sharon Lovejoy and "Hands-On Nature: Information and Activities for Exploring the Environment with Children" by Jenepher Lingelbach.

Thursday, October 6, 2011

Seed Hunt

The weather remains balmy for this Thursday's activity so we are heading outdoors for a Seed Hunt!  In the northern part of the US, September and October are ideal times to do a seed hunt and it can be done in a city park, suburban backyard or a large plot of land in the country.  If, however, you don't have access to a natural space or the weather or time of year is prohibitive. you could use your kitchen as the hunt location - spices, fruits and vegetables and even house plants could provide you with the seeds.  Remember to emphasize (and re-emphasize!) that the seeds should not be eaten as some may be poisonous.

Materials Needed:
To get into the spirit of this activity, the more thoroughly you can "outfit" your little naturalist, the better.  If they think they look like a "real" naturalist, they are more likely to take the activity seriously.  (It's kind of like dressing up, but better.)  Below is what we packed in the girls' nature bags,  
including:
  • binoculars
  • magnifying glass
  • pencil
  • sample bags (small and large) with paper id slips in them
  • ID books
  • camera
This is by no means an all-inclusive list and you could certainly add or subtract items.  At a minimum, you should have a pencil, sample bags and some way to ID the plants.  I happen to have several different tree, plant and shrub guides, including a couple of the Peterson series.  The standard ones are a little too dense for smaller children, but the First Guides one seems a bit more accessible to me.  I recently saw the Fandesk Family Guide to Trees and I'm intrigued by it - maybe a stocking stuffer for the Holidays?  If you are a technology fan, or just don't want to shell out the money on paper guides, there is a great (free!) on-line tree ID guide by the Arbor Day Foundation.  They also have an iPhone app.  The Audubon Society has a series of apps (including tree, wildflower, bird and mammals) that are wonderful, but more expensive; I think you can get all 4 for $20 and I've seen coupons out there.  (If you are curious, the nature bags are sewn from the "Naturalist's Scavenger Hunt Bag" pattern in the book, Growing Up Sew Liberated by the talented Meg McElwee, of the Sew Liberated blog.)